
IMPORTANT NOTICE
I have made a video on DIY bottle irrigation. Here is a link to the video. You should watch it alongside this article as it helps to understand more about the innovation. The video and this article complement each other, but they do have some insight(s) peculiar to each of them. So, I strongly advise you go through both.
Rationale
In urgent need of a way to irrigate the tomatoes I am currently raising I stumbled upon DIY bottle irrigation searching the internet for irrigation ideas.
Drip irrigation (best for tomato) wasn’t an option as it was costly and also that, I was only doing a small tomato project which the benefit to cost for such infrastructural investment was small.
Another issue’s that, the tomato plant is one delicate crop that gets stressed with little or excess water condition; it requires water in the right quantity and timely.
So, the irrigation method I would settle for would check and embody being affordable, effective, efficient, and sustainable
The DIY bottle irrigation qualified on all of these –I could cheaply source bottles around, and when the bottles are filled water drips as needed to suffice the plants for 2 to 3 days.
However, soon as I started, I realised some basics, laws have to be adhered.
Failing on these, many times the irrigation water just gets wasted from evaporation or bottle falling over.
Other times the bottles don’t drain at all or, get clogged.
Eventually, with research and frequent experimentation I found a perfect way out and combination.
With my predicament on DIY bottle irrigation –and people asking me how to go about it when I posted a video of my tomato project run on the innovation –I made it a thing to write explaining the fundamentals of this initiative.
What the write-up will be about
But this write up would go beyond the basics and touch on bottle selection detailing pros and cons of some preferred bottles, and also unusual insights that could be beneficial.
The fundamentals to stick to:
1. Thick neck bottle as Mike Tyson’s

Yeah you read that right. This is the first and one of the most basic things to watch out for and ensure when selecting a bottle for this irrigation style.
I used the headline above as analogy because it relates.
Having a thick neck is often advised in the boxing world because when the head receives blows, it’s the neck that holds it in place from wobbling and to stay alert.
And Mike Tyson, the legendary boxer, was known for his thick neck.
In a similar manner, when you drive a bottle upside down via the mouth into the soil, it is the neck that gives the bottle firm grip from wobbling and even falling over when hit by wind, rain, or animals.
But you could think there would be no need for such if the bottle is placed in erect vertical position relieving the neck region of pressure or duty of holding the bottle in position.
However, there’s more to this than is said here and the other benefits of this are discussed in the next point of this section.
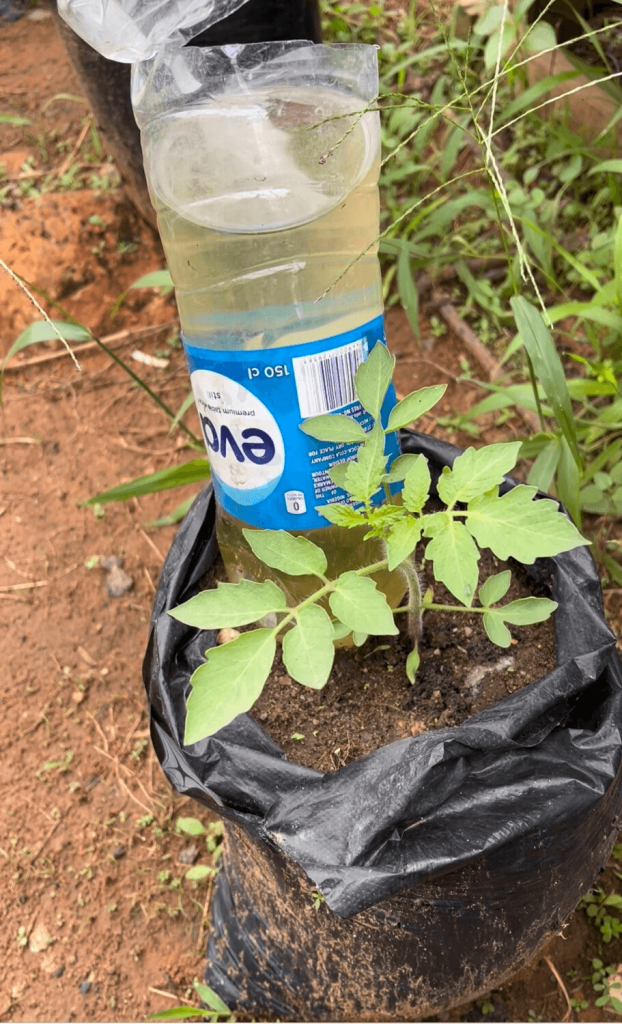
So, basically, you want to get a bottle as the image below -a regular energy drink bottle extruded for thickness.
2. Long neck bottle to avoid bottlenecks
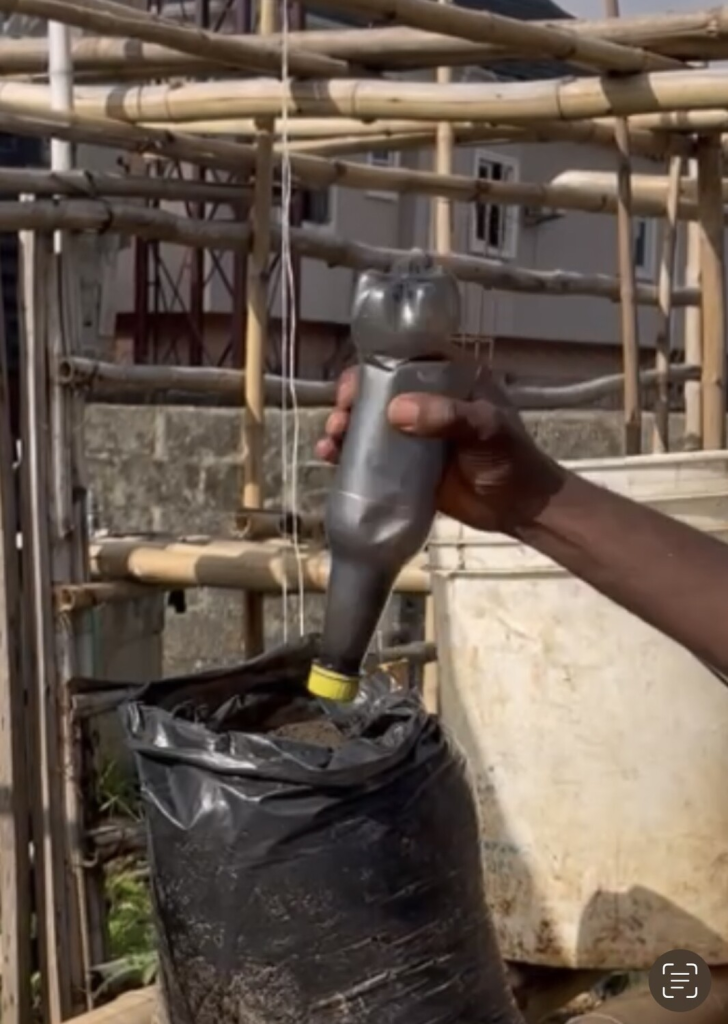
Getting a thick neck bottle isn’t enough, the neck being long is also important (see image 1).
This is that the whole neck region would go into the soil and thus give more grip to the bottle and in holding firm its content to still drip even with disturbance.
Nonetheless, that’s not all to it with the advantage of a long neck bottle.
Since this type of bottle penetrates deep into the soil, it supplies water directly to the root in the way and where it is needed.
No stress for the root finding its way to where the water is.
However, this merit may not be realised if the plant is still young with the roots not fully established and just at topsoil level to access water below in the soil profile.
Even, a long neck bottle and its pro aren’t a guarantee when the bottle hasn’t been punctured appropriately to drip as required. The next subheading addresses this.
3. Get the drip hole right
This is the most fundamental part of the bottle drip irrigation. Other features checked but the bottle failing to drip or drips inaccurately (too slow or fast) renders the whole concept ineffective.
The irrigation set in motion there’s tendency that the drip hole would get clogged with soil particles able to go into the bottle via the bottle cover hole.
And most times it is not about how big or small the drip hole is that enables dripping or clogging of drip hole.
Even, soil particles may not clog the hole and weeds do that instead, growing out the hole taking advantage of cheap water.
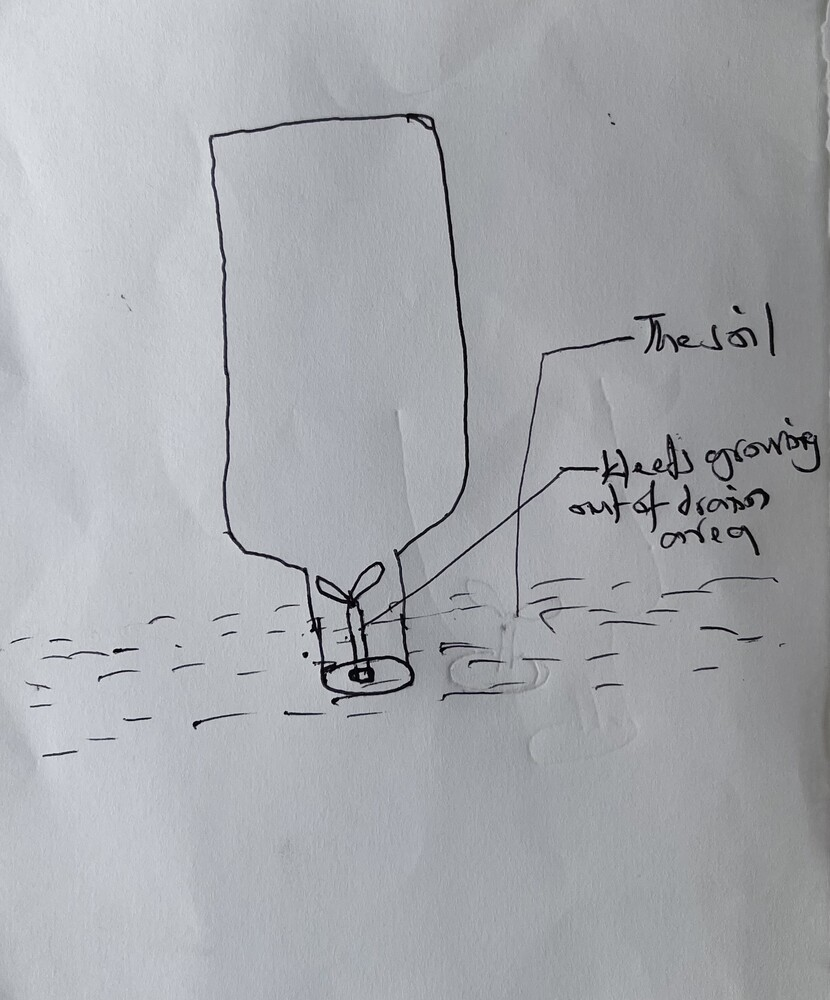
Other times, the clogging is done by external particles entering through the water in-let side of the bottle (check image 2).
What I would advice here, after making a hole with a medium size nail, is to pass a thick thread in proportion of and through the drip hole. Hence, other than water leaving the bottle by dripping it does by osmosis.
And one added advantage of passing thread through the cover hole than just leaving it bare is that, water is regulated.
With osmosis water moves from a place having less water affinity and is filled with water to a dry area. Once the dry area becomes wet (saturated) and as the former area, water movement ceases.
But this may not be the case for a bottle with bare cover hole and water could overflow, causing waterlogged condition and with water wasted.
4. Use a big size bottle
A big bottle would help to hold and provide more water and over a good period of time (2 to 3 days) for grown crops.
But the problem is that big size bottles seldom come in a long neck.
And with this there’s likelihood of bottle tipping over when placed in the soil, but still works when erected upright and/or with support.
The exception is glass bottles –for instance, a regular wine bottle –with a huge size and a long neck.
But there haven’t been use cases of them for DIY irrigation, understandable with their complex nature in comparison to plastic bottles.
Nonetheless, this is just one of the merits of a big size bottle. The other is of draining benefit explained in the below.
5. Embrace gravity and even more, inclined angle
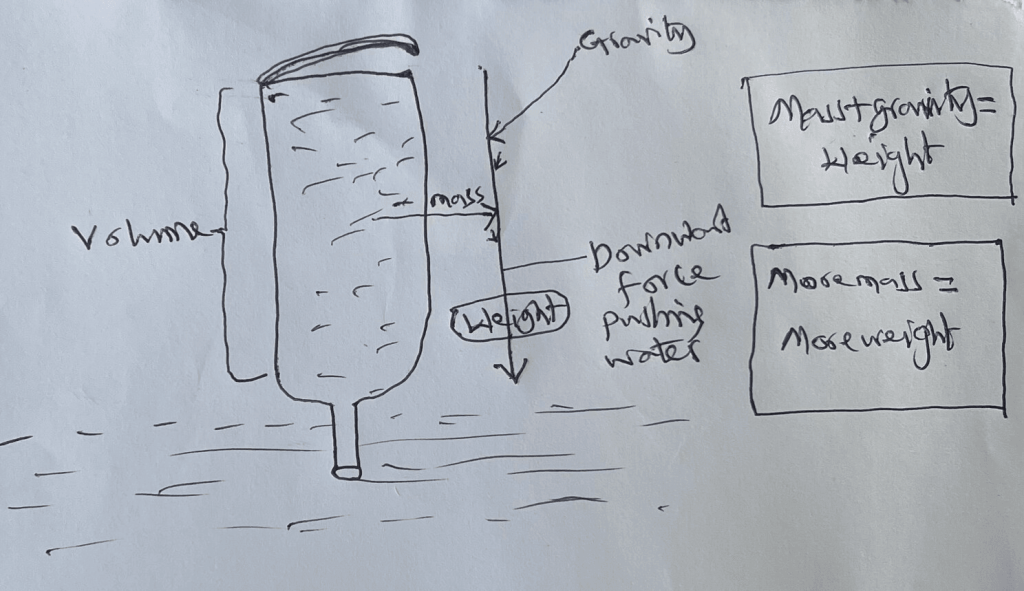
The bigger the mass of an object the heavier the weight will be when acted upon by gravity.
Also, the heavier the weight the more the tendency the object will fall to the earth surface when suspended in air, as gravity acts on the mass.
Now, using a big bottle would help to seize gravity’s advantage. The bottle filled, both the mass of the water and gravity, act downwardly on the water (image below gives illustration).
This improves draining and helps to unclog drain area with force in a case where a thread isn’t passed through cover hole.
Even, since the bottle is taller, gravity acts more on it and its content as gravity pushes object back to the earth’s surface, and it acts more on taller object trying to defy it.
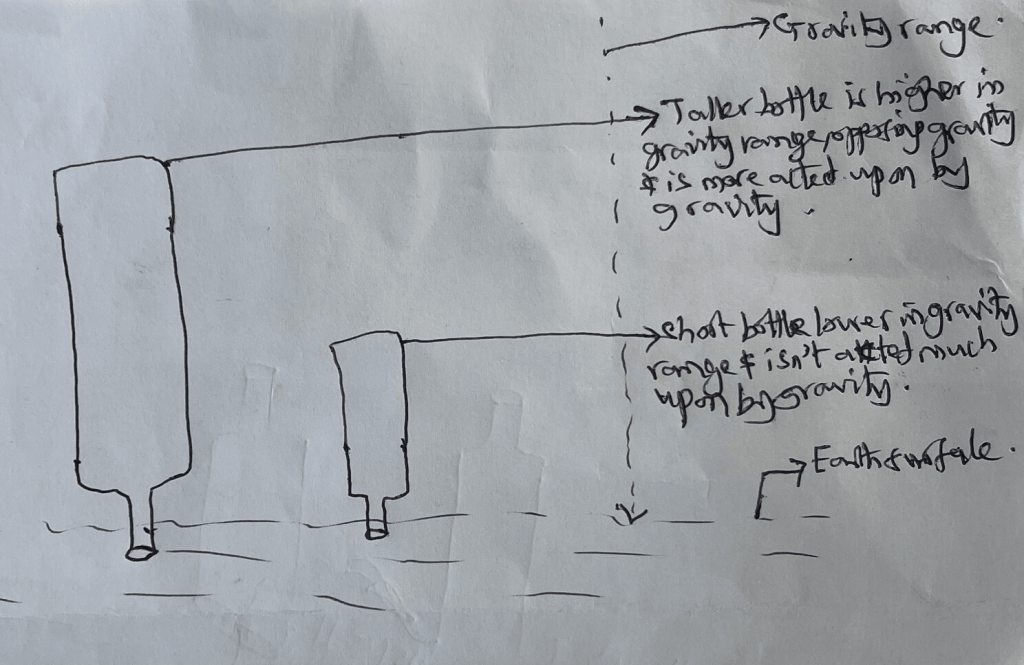
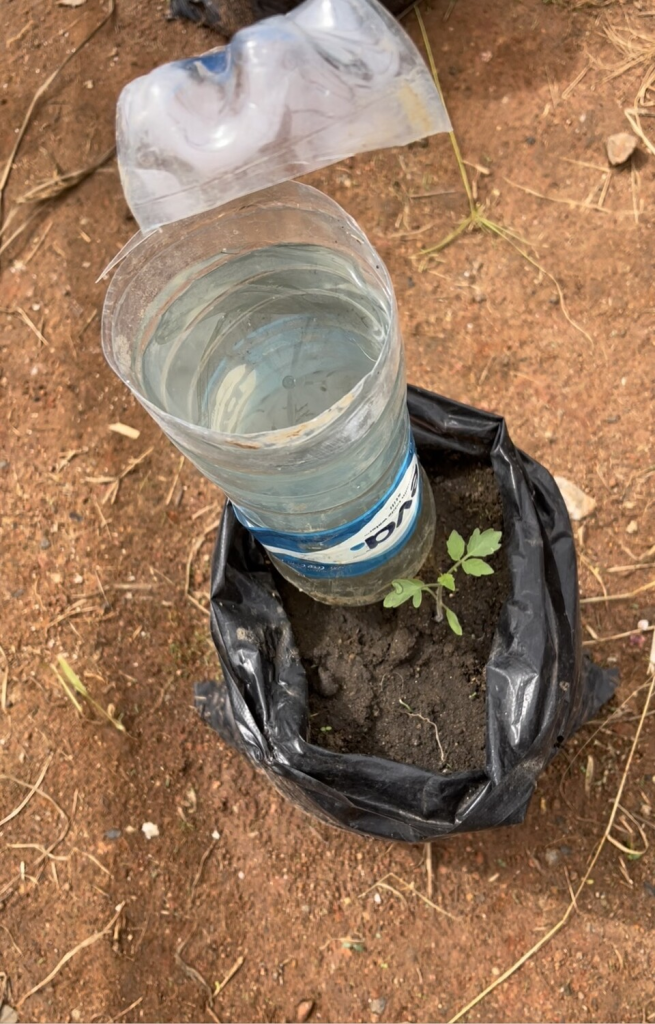
Inclined angle should be embraced too to complement gravity. This simply means placing the bottle in a slant position (as image above) to enable water flow.
You know how water would run off easily and steadily on an inclined plane than on a horizontal plane or too fast left to drip in a vertically placed bottle.
6. How you cut the water inlet matters
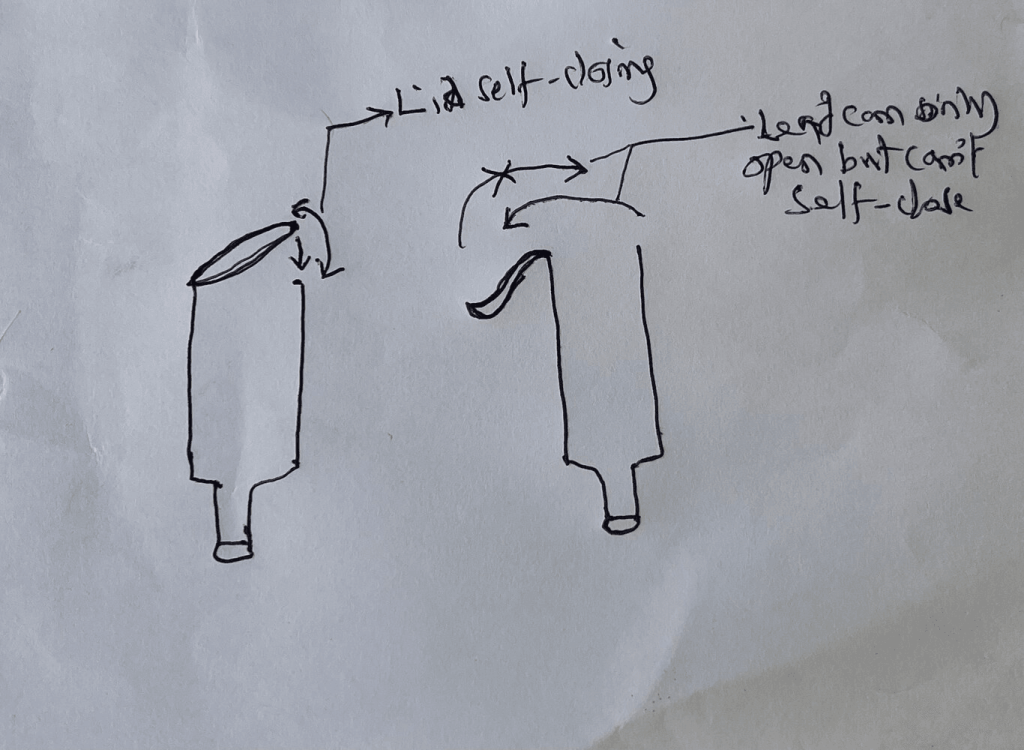
There are two ways to this and both have their pros and cons.
You either cut almost open the base of the bottle that would serve as the inlet such that the lid doesn’t return to its initial position, or that you cut in a way the lid can always go back to its previous position.
The former ensures that when it rains the bottle, with its lead open, can store rainwater and be channeled to irrigate the plants.
However, the downside is that particles from the surroundings get to enter the bottle which may go the block the drip region. Water loss to evaporation is the other con.
The other method is just opposite; it prevents dirt from the environment entering the bottle and also evaporation, but can’t store water when it rains as it is self-closing.
It also prevents pest which may be harmful to the plants require water to multiply from breeding in the bottles.
Unusual insights
1. There’s a plus with soda drink bottle
I advise using soda drink for two reasons –one based on fact and the other based on assumption but could still be tried out.
One is used soda bottles often contain leftover sugar and this encourages the presence and activities of beneficial insects and microbes in the soil.
The insects in their moving around and burrowing while feeding on the sugar improve soil aeration, water percolation and physical properties of the soil with holes made and their movement.
The microbes breaking the leftover sugar help to improve the fertility of the soil releasing important nutrients and balancing soil PH.
2. Coloured bottle could be beneficial
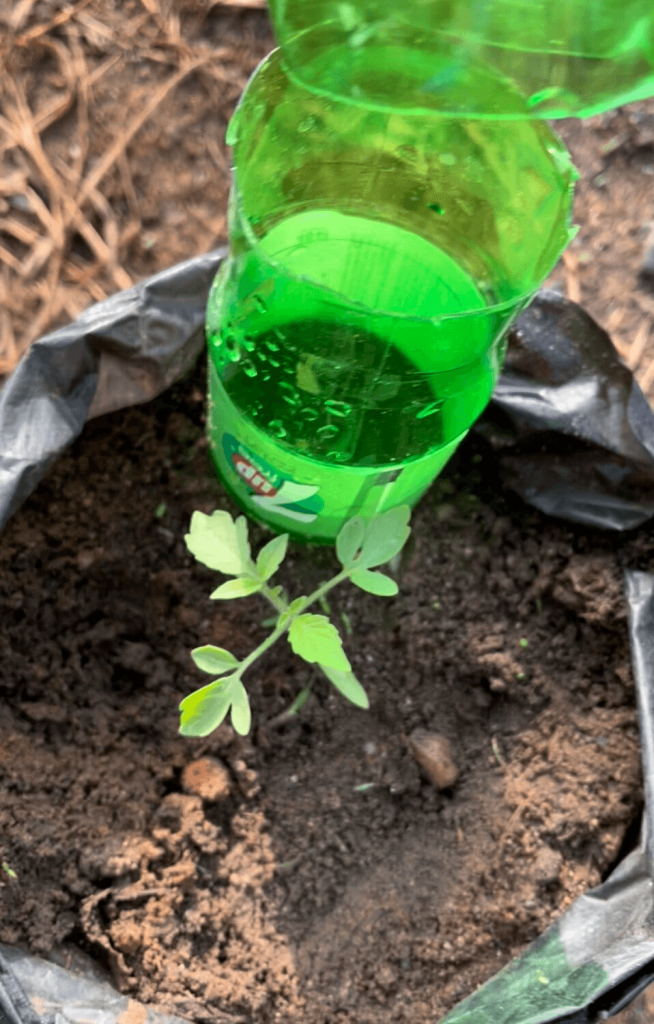
The other merit which I’ve observed has to do with bottles that are coloured.
I noticed that the tomatoes, 6 of 10, I’ve grown beside coloured bottles particularly of red, blue, green did well.
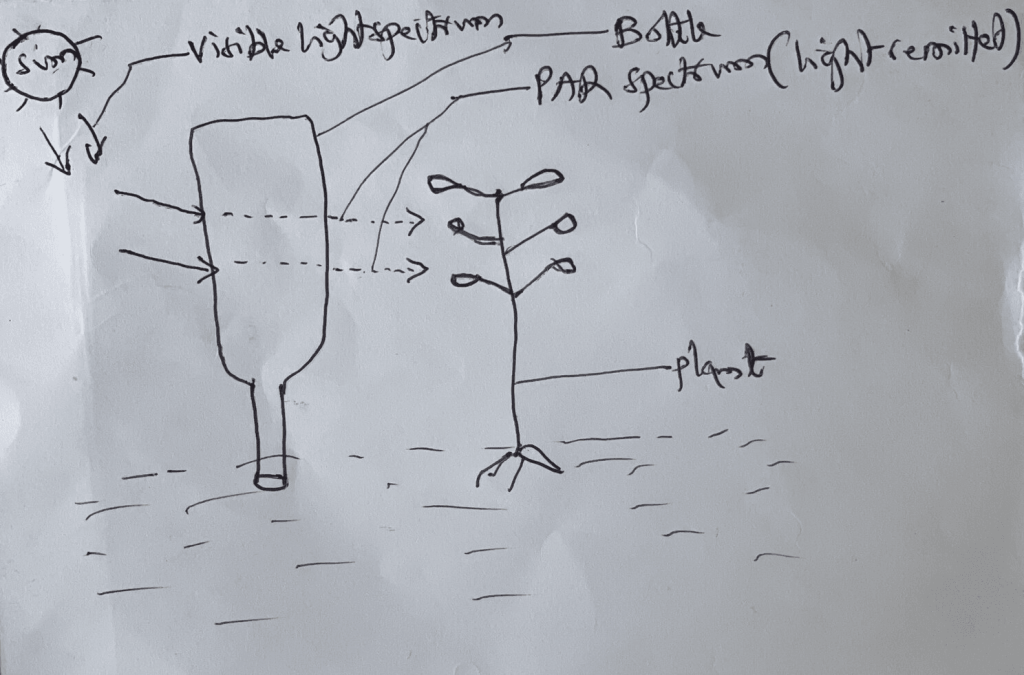
Light in the spectrum of the photosynthetic active radiation (PAR) containing the blue, red, green light wavelengths are important for plant growth and development.
I suspect the red, blue and green bottles act like as a film screen, filtering light into the light wavelengths important for plants to thrive.
I believe when the visible light spectrum from the sun hit these bottles, they are re-emitted into blue, red and green light wavelengths of the PAR spectrum.
However, if this is true, there can be a disadvantage because, each of those light ranges has their own function for plants and plants require them differently, either solely or as a combination, in intensity and period at different stages of growth and development.
And this potentially could explain why some of my tomatoes didn’t do well beside the discussed bottles thought to be beneficial.
Moreover, if this observation is plausible, then plants could be victim to light wavelengths that have been observed to induce stress in them, like the yellow/orange light spectrum.
In addition, plants would eventually outgrow the bottle which limits realisation of the assumed advantage.

Other benefits of DIY bottle irrigation
- It used in/aids fertiliser application, as fertiliser can be placed in the irrigation water which dissolves slowly and then is delivered in little doses and in absorbable form, lowering risks of toxicity.
- It can help to determine water level in soil, as when the soil is saturated water flows back into the bottle which gives an indication of water level.
- Can serve as rainguage when the bottle is calibrated and the the lid open. After rain you could have a rough estimate of the amount of rainfall for the raining period.
Precautions
1. Use clean bottle always
Irrigation medium is as important as growing medium. One wants to ensure clean and hygienic bottle so as not to introduce harmful microbes to the plants.
2. Use clean, clear water
Clean irrigation water is even more important. Some plant diseases are waterborne hence using unclean water could do more harm.
End note:
An operational bottle you would want to use would have a long neck, be of huge size, and could be also coloured to potentially benefit from the discussed assumed benefit. It should also embody the water outlet equipped with a thread, the inlet cut out to be self-closing preventing evaporation and dirt accumulation that would clog drain region.